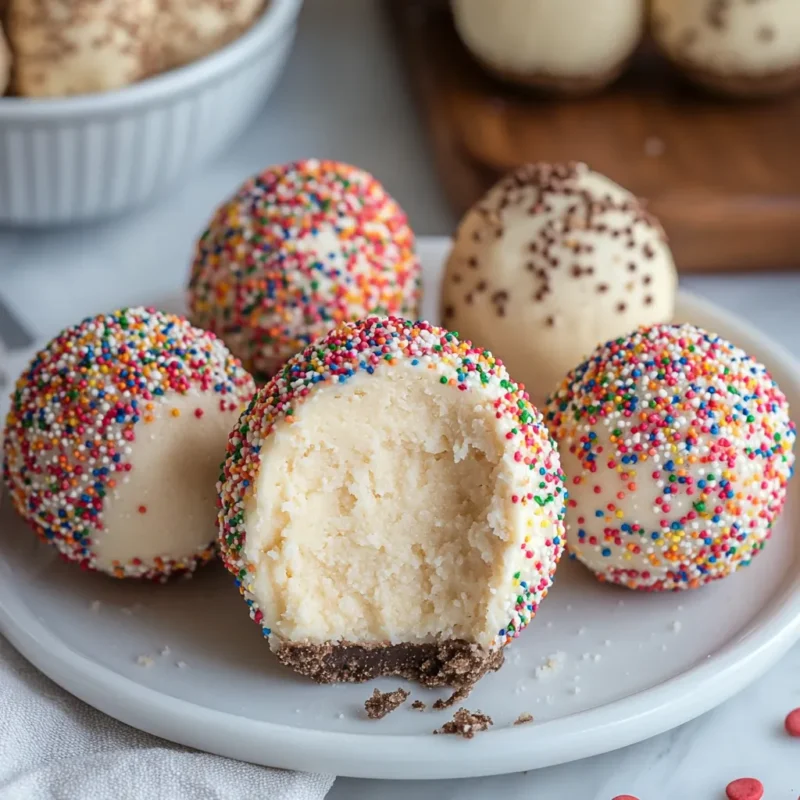
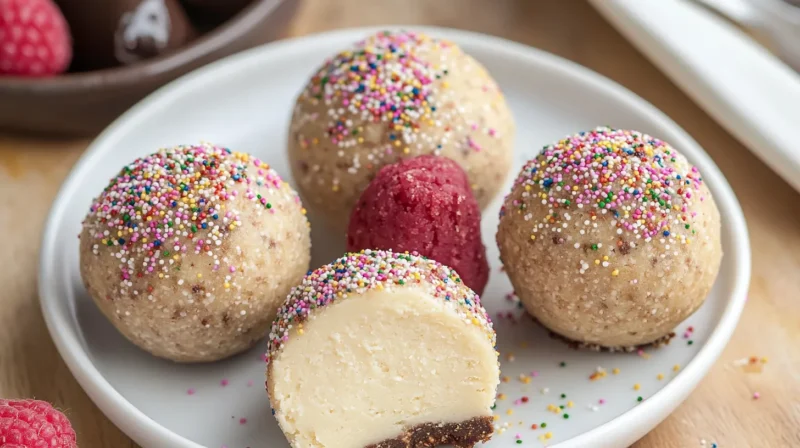
A cheesecake ball recipe is the perfect combination of creamy cheesecake and playful finger food. These bite-sized treats are versatile, easy to make, and an absolute crowd-pleaser. Whether you’re hosting a party, looking for a unique dessert, or simply satisfying a sweet tooth, this recipe is your go-to solution.

Why You’ll Love This Recipe
This cheesecake ball recipe is more than just a dessert—it’s a versatile and crowd-pleasing treat that you’ll want to make again and again. Here’s a closer look at why this recipe is so special:

1. Quick and Easy
- No Baking Required: This recipe eliminates the need for baking, making it perfect for when you need a quick and hassle-free dessert.
- Minimal Effort: With only a few simple steps—mix, chill, roll, and coat—you can create a professional-looking treat in no time.
- Beginner-Friendly: Whether you’re a seasoned baker or new to the kitchen, this recipe is easy to follow and delivers great results every time.
2. Customizable
- Endless Flavor Options: Incorporate flavors like vanilla, lemon, or chocolate into the cheesecake mixture to suit your taste.
- Variety of Coatings: Choose from crushed graham crackers, mini chocolate chips, shredded coconut, or sprinkles to create a unique mix of textures and flavors.
- Dietary Flexibility:
- Gluten-Free: Use gluten-free coatings like nuts or gluten-free graham crackers.
- Vegan: Replace cream cheese with a plant-based alternative and use powdered sugar made without animal products.
3. Perfect for Parties
- Bite-Sized and Convenient: Cheesecake balls are easy to grab and eat, making them a great addition to dessert tables or party platters.
- Visually Impressive: The assortment of coatings adds color and texture, creating an eye-catching display that will impress your guests.
- Kid-Friendly: These small, sweet treats are perfect for kids and adults alike, making them a hit at any gathering.
4. Make-Ahead Friendly
- Prepare in Advance: Cheesecake balls can be made up to 3 days ahead, saving you time and stress when planning for events or busy schedules.
- Stores Well: Keep them in the fridge or freeze for longer storage, ensuring you always have a treat ready for unexpected guests or cravings.
- Perfect Texture: Chilling the balls not only makes them easier to handle but also enhances their flavor and consistency.
5. Great for All Occasions
- Versatile Dessert: From casual family dinners to fancy holiday gatherings, cheesecake balls fit every occasion.
- Gifting Opportunity: Wrap them individually or arrange them in a decorative box to create a thoughtful homemade gift.
- Portable Treat: These easy-to-serve bites are perfect for potlucks, picnics, or road trips.
The Takeaway
This cheesecake ball recipe is the ultimate quick, easy, and versatile dessert. With endless customization options, party-perfect presentation, and the ability to make it ahead of time, it’s a recipe that will quickly become a favorite. Whether you’re hosting a celebration or enjoying a sweet moment at home, cheesecake balls are sure to delight!
How to Make Cheesecake Balls
Ingredients:
the Cheesecake Mixture:
- 8 ounces cream cheese, softened
- ½ cup powdered sugar
- ½ teaspoon vanilla extract
- ¼ teaspoon salt
the Coating:
- Crushed graham crackers
- Mini chocolate chips
- Shredded coconut
- Crushed nuts (optional)
Instructions:
Follow these easy steps to create perfectly smooth, delicious cheesecake balls every time:
1. Prepare the Cheesecake Mixture
- Start with Softened Cream Cheese:
- Ensure the cream cheese is at room temperature before beginning. This makes it easier to beat and creates a smooth, lump-free mixture.
- Pro Tip: If you’re short on time, microwave the cream cheese on low for 10–15 seconds to soften it quickly.
- Beat Until Smooth:
- Use an electric mixer or a whisk to beat the cream cheese until it’s velvety and free of lumps. This step is crucial for achieving a creamy texture.
- Add Flavorings:
- Gradually add the powdered sugar, vanilla extract, and a pinch of salt. Mix thoroughly until all ingredients are fully incorporated, and the mixture is rich and creamy.
2. Chill the Mixture
- Why It’s Important:
- Chilling the mixture allows it to firm up, making it easier to handle and roll into balls without sticking to your hands.
- How to Chill:
- Cover the mixing bowl with plastic wrap or a lid and refrigerate for at least 30 minutes.
- Pro Tip: If you’re in a hurry, place the bowl in the freezer for 10–15 minutes, but keep an eye on it to prevent over-chilling.
3. Form the Balls
- Portion the Mixture:
- Use a small cookie scoop or spoon to scoop out equal portions of the mixture (about 1 tablespoon each). This ensures consistent sizes and even cooking if you plan to freeze them.
- Roll Into Balls:
- Roll each portion between your palms to form a smooth, round ball.
- Pro Tip: Lightly dust your hands with powdered sugar if the mixture becomes sticky while rolling.
4. Coat the Cheesecake Balls
- Choose Your Coating:
- Prepare your desired coatings, such as crushed graham crackers, mini chocolate chips, shredded coconut, crushed nuts, or colorful sprinkles, in separate bowls.
- Roll and Coat:
- Gently roll each cheesecake ball in the chosen coating until evenly covered. Press lightly to ensure the coating adheres well.
- Pro Tip: Mix and match coatings for a variety of textures and flavors in one batch.
5. Chill Before Serving
- Set the Balls:
- Place the coated cheesecake balls on a tray lined with parchment paper to prevent sticking.
- Refrigerate for at least 1 hour to allow the balls to firm up and the flavors to meld.
- Storage Tips:
- Keep the cheesecake balls in an airtight container in the fridge until ready to serve. They can be stored for up to 3 days.
Bonus Tips for Perfect Cheesecake Balls
- Add a Surprise Center: Insert a small piece of fruit, a chocolate chip, or a nut in the center of each ball for an extra burst of flavor.
- Use Melted Chocolate: Drizzle melted chocolate over the coated balls for a decorative touch.
- Serve Chilled: Always serve cheesecake balls cold to maintain their structure and enhance the creamy texture.
The Takeaway
By following these detailed steps, you’ll create cheesecake balls that are perfectly creamy, flavorful, and visually stunning. Whether for a party, a gift, or a personal treat, these bite-sized delights are sure to impress!
Tips for Perfect Cheesecake Balls
- Soften Cream Cheese: Ensure the cream cheese is softened to avoid lumps in the mixture.
- Chill Well: Chilling the mixture makes it easier to handle and prevents the balls from sticking to your hands.
- Mix and Match Coatings: Combine different coatings for variety, such as half chocolate chips and half graham crackers.
- Use a Cookie Scoop: For uniform-sized balls, use a small cookie scoop to portion the mixture.
Creative Variations
- Chocolate-Dipped Cheesecake Balls: Dip the cheesecake balls into melted chocolate and let them set in the fridge for a decadent twist.
- Seasonal Flavors: Add pumpkin spice for a fall-inspired treat or peppermint extract for a festive holiday dessert.
- Fruit-Filled: Insert a small piece of fresh fruit, like a strawberry or raspberry, into the center of each ball for a fruity surprise.
- Caramel Drizzle: Drizzle caramel sauce over the balls just before serving for an extra layer of sweetness.
FAQs About Cheesecake Ball Recipe
1. Can I make cheesecake balls ahead of time?
Yes! Cheesecake balls can be made up to 3 days in advance. Store them in an airtight container in the refrigerator until ready to serve.
2. Can I freeze cheesecake balls?
Absolutely. Freeze them on a baking sheet, then transfer to a freezer-safe bag or container. Thaw in the fridge before serving.
3. What coatings work best for cheesecake balls?
Crushed graham crackers, mini chocolate chips, shredded coconut, and crushed nuts are popular options. You can also try sprinkles for a fun touch.
4. Can I make these cheesecake balls gluten-free?
Yes! Use gluten-free graham crackers or other gluten-free coatings like crushed nuts or shredded coconut.
Serving Suggestions
Cheesecake balls are versatile and easy to serve in creative ways, making them a delightful addition to any occasion. Whether you’re preparing for a casual get-together or an elegant event, these ideas will help you present them in the best way possible:
1. As a Dessert Platter
- Why It Works: A platter of cheesecake balls with assorted coatings is visually stunning and allows guests to sample a variety of flavors.
- How to Present:
- Arrange the balls on a decorative serving tray or tiered stand for added elegance.
- Separate flavors by coating type, such as graham cracker, chocolate chips, coconut, or nuts.
- Add edible garnishes like mint leaves or powdered sugar for a polished look.
- Pro Tip: Label the coatings on small tags or cards for an extra thoughtful touch.
2. With Fresh Fruit
- Why It Works: The tartness and juiciness of fresh fruit complement the creamy, sweet richness of the cheesecake balls, creating a balanced flavor profile.
- Pairing Ideas:
- Strawberries, raspberries, or blueberries add vibrant color and a refreshing taste.
- Sliced apples or pears work well for a crisp texture contrast.
- For a tropical vibe, serve with pineapple chunks or mango slices.
- Pro Tip: Arrange fruit and cheesecake balls together on a platter for a balanced and colorful presentation.
3. For Dipping
- Why It Works: Dipping sauces elevate the indulgence factor and give guests a customizable dessert experience.
- Sauce Ideas:
- Chocolate Sauce: Use melted dark, milk, or white chocolate for a rich and velvety dip.
- Caramel Sauce: Add a buttery sweetness to each bite.
- Berry Coulis: A drizzle of raspberry or blackberry sauce provides a tangy twist.
- Pro Tip: Serve the sauces in small bowls with spoons, or pour them into squeeze bottles for easy drizzling.
4. As Party Favors
- Why It Works: Individually wrapped cheesecake balls make for a thoughtful, grab-and-go treat that guests can take home.
- How to Package:
- Place each ball in a mini cupcake liner for a polished and professional look.
- Wrap in clear cellophane bags and tie with colorful ribbons for added charm.
- Include a small tag with the flavor or a thank-you note for a personal touch.
- Pro Tip: Keep the favors chilled in a cooler or fridge until the end of the event to maintain freshness.
5. As a Sweet Snack
- Why It Works: Cheesecake balls are perfect for a quick dessert or a midday pick-me-up.
- Ideas:
- Serve them as an after-school snack for kids or a post-dinner treat for the family.
- Pair with a cup of coffee or tea for an afternoon indulgence.
6. With Themed Decorations
- Why It Works: Cheesecake balls can be customized for holidays or themed events, making them versatile and festive.
- Ideas:
- Use red and green sprinkles for Christmas, heart-shaped toppers for Valentine’s Day, or pastel decorations for Easter.
- Add gold or silver edible glitter for a glamorous touch at weddings or New Year’s Eve parties.
The Takeaway
Cheesecake balls are not only delicious but also versatile, allowing you to get creative with presentation and pairings. Whether served on a dessert platter, paired with fruit, or offered as party favors, they’re sure to impress your guests and leave everyone asking for more!
Conclusion
This cheesecake ball recipe is a fun and delicious way to enjoy the classic flavors of cheesecake in a bite-sized treat. Easy to make, endlessly customizable, and perfect for any occasion, these cheesecake balls are sure to be a hit. Whip up a batch today and watch them disappear at your next gathering! For more dessert inspiration, explore our Ultimate Guide to Desserts and discover even more sweet treats to try.

